

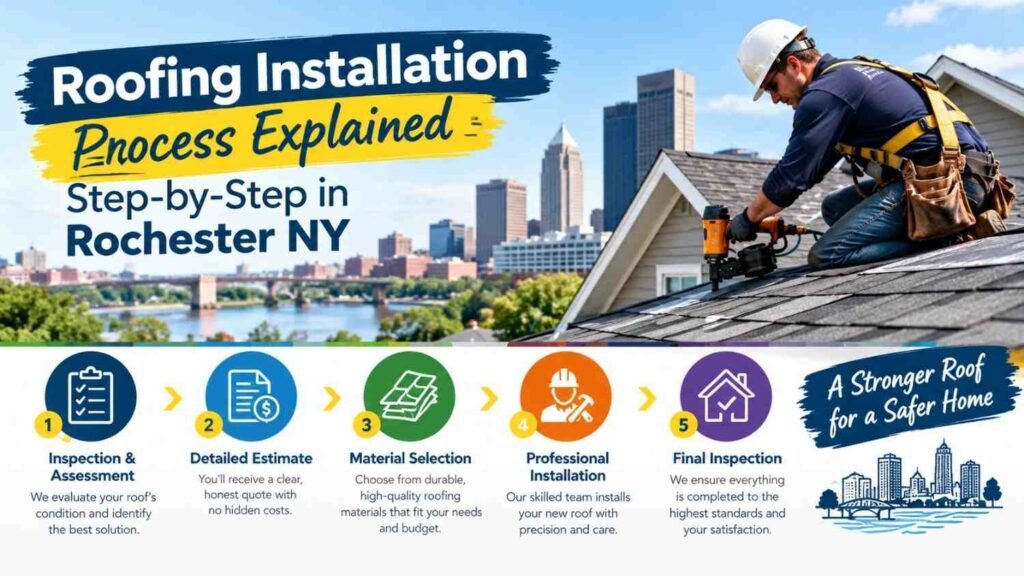
Roofing Installation Process Explained Step-by-Step in Rochester NY is ideal for homeowners to learn what happens from the initial roof evaluation through the final clean-up. With an understanding of the roof installation Rochester NY process, it may be easier to plan a roof replacement Rochester NY in an area that is subject to snow, rain, wind, ice, freezing temperatures, and seasonal fluctuations in temperature. A roofing system installed by a professional does much more than simply enhance the beauty of the house. It secures the structure, maintains moisture management, promotes energy efficiency and offers long-lasting protection against Rochester’s weather conditions.
There are multiple steps to the roof installation process that need to be carefully planned. Contractors will need to assess the existing roof, estimate material needs, prepare the site, tear off old roofing material if needed, check the roof deck surface, lay additional protective layers down, and finish the roof surface. Every phase has an impact on the final roof’s performance.
This step-by-step guide is designed to tell Rochester homeowners what they can expect from a roofing installation by a Roofing Professional.
Why Proper Roof Installation Matters in Rochester NY
Even if a roof is made with high-quality material, it must be installed properly to function properly.
Weather varies in Rochester all year long. Snow, ice, and freezing temperatures are possible in the winter months, and rain, heat, humidity and storms join the winter mix in the warmer months. The changes continuously stress roofing materials.
There are a number of issues that can result from poor installation, including:
- Water leaks
- Loose or damaged shingles
- Premature material deterioration
- Moisture entering the roof system
- Poor ventilation
- Ice-related problems
- Damaged flashing
- Reduced roof lifespan
A systematic roof installation Rochester NY process will help ensure that various components of the roofing system cooperate.
Step 1: Initial Roof Inspection
Typically, the first step is a thorough examination of the current roof.
A roofing contractor assesses the state of the roofing system and discerns what may be required to be done. Shingles or other roofing materials, flashing, roof penetrations, ventilation components, gutters and visible structural areas may be inspected.
A contractor might inspect for missing shingles, curling shingles, damaged flashing, soft spots, water stains or leaks, or deterioration.
During the inspection, it can also be agreed whether the roof should be removed or if there are alternative options available depending on the property and applicable requirements.
This is a time when homeowners should have a conversation about any current issues they may have, such as leaks, moisture in the attic, air leaks, or prior repairs.
Step 2: Measuring the Roof and Estimating Materials
After the roof is evaluated, proper measurements are required.
Roofing contractors estimate the size of a roof, taking into account its pitch, shape, valleys, ridges, dormers, etc.
These measurements are used to calculate the amount of materials needed for installation.
Materials can include:
- Roofing shingles or panels
- Underlayment
- Ice and water protection:
- Flashing
- Drip edge
- Fasteners
- Ridge materials
- Ventilation components
Typically, contractors will estimate some extra material as roofing can be cut around edges, valleys, vents, and other structures.
With accurate measurements, you can minimize wasted time and ensure you have the correct quantity of materials for the job.
Step 3: Selecting the Roofing Material
Another crucial aspect of the roof installation Rochester NY process is the selection of the roofing material.
When looking at roofing options, homeowners should take into account appearance, what they can expect to last, maintenance needs, cost, manufacturer requirements, and suitability for the home’s structure.
Asphalt shingles are a popular choice for residential roofing due to their variety of styles and pricing options. Other homes may have metal roofing or other roofing systems.
Not always is the most expensive material the best choice. It should be appropriate for the property and installed as per the manufacturer’s guidelines.
Color should also be considered because a new roof can noticeably change a home’s exterior appearance.
Step 4: Reviewing the Roofing Estimate and Project Scope
Homeowners need to be aware of exactly what the roofing project entails before the installation starts.
A written estimate or contract should clearly outline the work planned.
Consider including:
- Roofing material
- Removal of existing materials
- Deck repairs
- Underlayment
- Flashing work
- Ventilation
- Cleanup
- Disposal
- Project schedule
- Warranty information
Homeowners should have any questions answered before work is done.
By defining the scope of the project, some confusion can be avoided with the removal of old roofing materials, particularly if there is damage to the decking or other problems are found once the old roofing material has been removed.
Step 5: Scheduling the Installation
Installation of roofs is dependent on the weather. The contractors want to see favorable conditions to install materials safely and properly. A project may be delayed due to severe weather, such as heavy rain, snow, strong winds, etc.
Weather is a crucial variable in Rochester roofing projects.
Homeowners should understand that the contracted installation date can sometimes be subject to change for reasons beyond the contractor’s control.
The total duration of the project varies according to roof size, roof complexity, material type, crew size, condition of the existing roof, and weather.
A straightforward residential roof may progress quickly, while a larger or more complex roof can require additional time.
Step 6: Preparing the Property
The surrounding property needs to be prepared before removing the old roof.
The roof replacement includes workers with ladders and tools, roofing materials, and falling debris. Contractors tend to set up work zones to ensure there is an organized project.
This could involve requesting that vehicles be cleared from the property and moved away from the house so they are not obstructed by equipment or hit by debris.
Any outdoor furniture, decorations, grills, and other mobile items near the home will also require moving.
Vibrations from the roofing operations at times disturb the loosely placed objects within the house. Decorations or items in the attic that are easily damaged could require extra protection.
Appropriate preparation allows roofing crews sufficient space to work and also helps to protect the property.
Step 7: Removing the Existing Roofing Materials
If a roof replacement is going to be done in its entirety, the next step is to remove the existing roof.
Roofers are professionals at safely scraping away all the old shingles or any other elements to expose the layers beneath.
Building demolition is a chance for contractors to see into areas that were once covered by the current roof.
This is significant as the exterior may not reflect the complete state of the roof deck.
Any roofing material that needs to be removed from the roof is collected and stored in suitable disposal containers and not left around the property.
The removal stage may be noisy but has the advantage of giving the contractor access to the underlying roofing structure.
Step 8: Inspecting the Roof Deck
After the roofing materials have been stripped off, the roof decking is inspected.
The deck forms the solid substrate that supports the roofing system. It needs to be sufficiently sound for new materials to be installed.
Roofers can expect to find:
- Rot
- Water damage
- Soft sections
- Deteriorated wood
- Loose decking
- Open gaps
- Other structural concerns
Damaged areas might require repair or replacement prior to installation.
If necessary deck repairs are not performed, then problems would occur since new roofing materials would be placed on an unstable or deteriorated surface.
That’s why homeowners must never assume that there are no further repairs that can’t be spotted during the exterior inspection.
Step 9: Installing Drip Edge and Water Protection
Once the deck is ready, the roofing elements start being attached to it.
Drip edge is installed around suitable roof edges to aid in directing water away from prone areas and towards the drainage system.
Extra water-repellent lining can also be added to those parts of the building which are more susceptible to moisture.
In colder climates, areas of the roof that are vulnerable should be given special attention, as snow and ice can present difficult moisture issues.
They are mostly concealed when the roof is finished, but they are an important part of the roofing system.
Step 10: Installing Ice and Water Protection
Protection from ice is especially important in Rochester’s roofing.
During winter, snow on a roof can melt and later refreeze near colder areas. Water can also move into vulnerable roof sections if the roofing system is not adequately protected.
Ice and water protection is generally provided in the designed vulnerable areas as per the roofing design, needs and applicable standards.
These can include roof edges, roof valleys, as well as some penetrations and transitions.
Positioning is dependent upon the roofing system and property.
This layer is placed over the roofing material to give extra protection underneath.
Step 11: Installing Roofing Underlayment
Underlayment is placed under the roofing material.
It serves as a second barrier between the roof deck and the exterior roofing material.
Underlayment is not visible after installation, but it is a key aspect of the system.
Contractors need to ensure it is laid properly, and fastened and overlapped as necessary.
The type of underlayment needed will depend on the roofing system that is used, so the contractor should refer to the product and manufacturer requirements.
Step 12: Installing Flashing Around Vulnerable Areas
Certain portions of a roof may be more susceptible to water intrusion than a large, flat roof surface.
These sites can be:
- Chimneys
- Skylights
- Roof valleys
- Plumbing vents
- Walls connecting to roof areas
- Other roof penetrations
Flashing will help to direct water away from these areas.
Contractors perform a visual inspection of the existing flashing during replacement and decide what to replace or integrate into the new roofing system.
Although the surrounding shingles may look fine, having the correct flashing installed is crucial, as there are small gaps or transitions that can allow flaking shingles to leak.
Step 13: Installing the New Roofing Material
Installing the new roofing surface can now be done.
Typically, installation starts from the bottom of the roof and works up in a systematic pattern on an asphalt shingle roof.
Shingles have to be aligned, overlapped and fastened as specified by the roofing system.
It is particularly vital that the fastenings are correct. Shingle performance can be impacted by the placement, number or over-driven fasteners.
Roofers are also careful around valleys, vents, chimneys and other roof features.
Installation proceeds upward and each segment is connected to the others in order to provide an uninterrupted roofing surface.
Step 14: Completing Ridge and Hip Areas
Ridges and hips are added if required after the roofing surface is installed.
They are places of intersection between planes of different roofs.
You can finish these roof transitions with materials other than the standard roofing and protect the look with special ridge or hip materials.
These components must be compatible with the basic roofing system and must be added following the manufacturer’s specifications.
Finishing these areas helps to make the roof look good, while also keeping it warm and dry.
Taking into account roof ventilation.
Step 15: Checking Roof Ventilation
Ventilation in the attic or roof may impact heat and moisture control within the roof system.
Well-designed ventilation is usually one in which cooler air enters through the intake vents and warm air exits through the exhaust vents.
Inadequate ventilation can lead to moisture accumulation and high temperatures in the attic.
Since each property is unique, contractors should assess the existing ventilation system rather than just installing vents.
Ventilation is a special concern in long-term roofing in a climate where there are pronounced seasonal temperature fluctuations.
Step 16: Installing or Rechecking Roof Penetrations
Correct finishing of roof penetrations.
Interruptions in the roofing surface are created by plumbing vents, exhaust vents, chimneys, skylights, etc.
Contractors must ensure the roofing material, flashing and seals around these areas are all integrated.
This will minimize the chance of water entering at a later date.
Older pieces might also be located during the installation process and could need attention if they are in bad shape or if the project scope is agreed upon.
Step 17: Final Roof Inspection
After the roof has been installed, the contractor should inspect the completed roof.
Items that may be reviewed during the inspection include shingle alignment, flashing, exposed fasteners, ridge areas, ventilation components, roof penetrations and more.
Contractors can also attest that materials were set throughout the roof.
This last step in the roof installation Rochester NY process is crucial, as it gives the opportunity to solve finishing problems before the job is finished.
Step 18: Cleaning the Property
A lot of debris is produced during the installation of roofs, particularly when a roof is removed.
When professionally cleaned up, discarded roofing materials, packaging, nails and other construction debris should be picked up.
Crews should check under the house as well as the following areas:
- Driveways
- Walkways
- Lawns
- Landscaping
- Patios
- Areas near entrances
Magnetic tools can be used by contractors to facilitate the retrieval of stray metal fasteners on the ground.
Even waste containers and materials not used must be cleaned up at the end of the project.
Aims to ensure the property is left clean and usable, not leaving the construction debris to burden the homeowner.
Step 19: Reviewing Warranty and Maintenance Information
This project isn’t over when the crew departs.
Homeowners should be given and kept with the information regarding their new roof.
This may include manufacturer warranty info and contractor workmanship coverage, depending on the roofing system and contractor.
It’s important homeowners know what each warranty covers, its duration, whether it needs to be registered and what qualifies may impact coverage.
Having contracts, receipts, warranty papers, product information and installation records kept together will make future maintenance or warranty issues easier to handle.
Final Thoughts
Understanding the roof installation Rochester NY process helps homeowners know what is happening at every stage of a roof replacement. A complete installation involves much more than removing old shingles and installing new ones.
The process begins with inspection and planning, followed by property preparation, removal of old roofing, deck evaluation, protective layer installation, flashing, new roofing materials, ventilation checks, finishing work, cleanup, and final inspection.
For Rochester homeowners, careful installation is particularly important because the roofing system must perform through snow, ice, rain, wind, freezing temperatures, and changing seasonal conditions.
Choosing suitable materials is important, but installation quality can be just as significant. Working with an experienced roofing contractor who follows a clear step-by-step process can help homeowners protect their property and get dependable long-term performance from their new roof.
Frequently Asked Questions
1. What time of year is best for installing a new roof in Rochester NY?
Late spring through fall often provides more favorable roofing conditions, but professional contractors may complete projects at other times when temperatures and weather allow. The best timing depends on the roofing material, current roof condition, forecast, and urgency of the replacement.
2. Can I stay in my house while my new roof is being installed?
Yes, homeowners can generally remain inside during residential roof installation. However, the work can create considerable noise and vibration. People working from home, young children, or pets sensitive to loud sounds may be more comfortable staying elsewhere during active construction hours.
3. Do I need to move my car before roof installation begins?
It is usually a good idea. Contractors may need driveway space for material deliveries, equipment, trailers, or waste containers. Moving vehicles away from the work zone also helps protect them from dust and falling roofing debris.
4. Will a new roof increase the value of my Rochester home?
A new roof can improve curb appeal and make a property more attractive to potential buyers because it reduces concerns about an aging roofing system. However, the exact effect on property value depends on the home’s condition, local housing market, roofing material, and installation quality.
5. What happens if it starts raining during roof installation?
Roofing contractors monitor weather forecasts and plan work accordingly. If unexpected rain occurs, exposed sections should be protected using appropriate temporary coverings. Contractors may stop installation until conditions become suitable for safe and proper roofing work.
6. Does homeowners insurance pay for a new roof installation?
Homeowners insurance may cover roof replacement when damage results from a covered event, such as certain storms or falling objects. It generally does not cover replacement simply because a roof has become old or deteriorated through normal wear. Homeowners should review their individual policy and speak with their insurer.
7. Do gutters need to be replaced when installing a new roof?
Not necessarily. Gutters that remain functional and in good condition may be kept. However, damaged, poorly positioned, leaking, or deteriorated gutters may be worth addressing during the roofing project. The contractor can inspect how the gutters interact with the new roof edge and drainage system.
8. How soon can solar panels be installed after getting a new roof?
Solar panels can generally be installed once the roofing project is fully completed and the roof is ready for additional work. Homeowners planning solar installation should tell their roofing contractor beforehand so roof condition, material choice, warranties, and future mounting requirements can be considered.
9. How can I tell whether my new roof was installed correctly?
After completing the roof installation Rochester NY process, the roof should have consistent material alignment, properly finished flashing, secure penetrations, completed ridge areas, and no obvious loose or damaged materials. Homeowners can also request a final walkthrough or project inspection from their roofing contractor.
10. What documents should I keep after a new roof installation?
Keep the signed contract, final invoice, material details, warranty documents, inspection information, photographs, and records of any additional repairs completed during installation. These documents may be useful for future maintenance, warranty claims, insurance questions, or selling the property.